Monday, September 17, 2012

The Lamp Revamp

Finally the conclusion to the lamp revamp that started with this...


First step sand the porcelain part...


Second step:  Primer the lamp base...

Third Step:  Watch paint dry... 
( I really like how the sun makes shadows on the spiral!)

Step four: Spray the lamp a shiny black...
Watch it dry some more and repaint where you miss.


And waa laa the finished lamp!


Hope I inspired you to create your own lamp.


Tuesday, September 11, 2012

Lamp Shade-capades!

Hello again,  it is time to get back to my lamp revamp project for class that I started doing research for a couple of weeks ago.  In the middle of the process I found another aspect I wanted to share with you.

Here is my wonderfully dated lamp that I got from the local DAV (Disabled American Veterans) for a whopping $4.


I absolutely hated and I mean HATED the horrible, dated, broken, and not to mention the dust on this lampshade.  So my plan was to rip off the loose from age accordion pink and recover it.


So above is the lampshade after I ripped off the accordion pink crap.  Unfortunately, I put a couple of holes in the shade in my enthusiasm to get rid of it.  The other problem was that I could not get all of the pink material off (see the pink lines on the shade).

One of the other issues and the one I would really like to focus on for awhile is the actual shape in relation to the lamp.
    I felt like this shade was too short and I really did not like being able to see the bottom of the electrical part.

So I had to go onto a new shade with a better and more suitable shape. 


This is a shade I found at Menards for about $8.  I liked the shape of this shade much better.  It was taller, slimmer, and sat lower in relation to the bulb.  The only problem I really had with this shade was the price.  Granted 8 dollars is not very much but with a budget of only $16 it was a lot when I still had to buy fabric and odds and ends.

So I had to go looking again for a similar shade that was more in my price range.


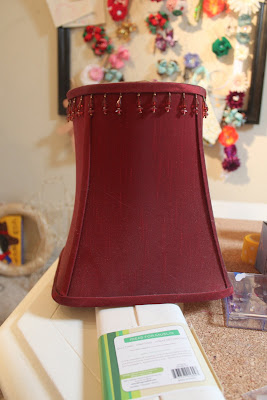
Here is my final choice for a shade.  I got it back at my trusty DAV for about $3.  BARGAIN!! 
It was a bit wider at the base than my Menards shade but it still covers the metal aspects of the lamp.  

This shade was a peach/ dusty rose color similar to the original shade.  
Another bonus was that I would not have to remove the fabric that was on the shade first.


The next step was going to the fabric store finding my fabric.

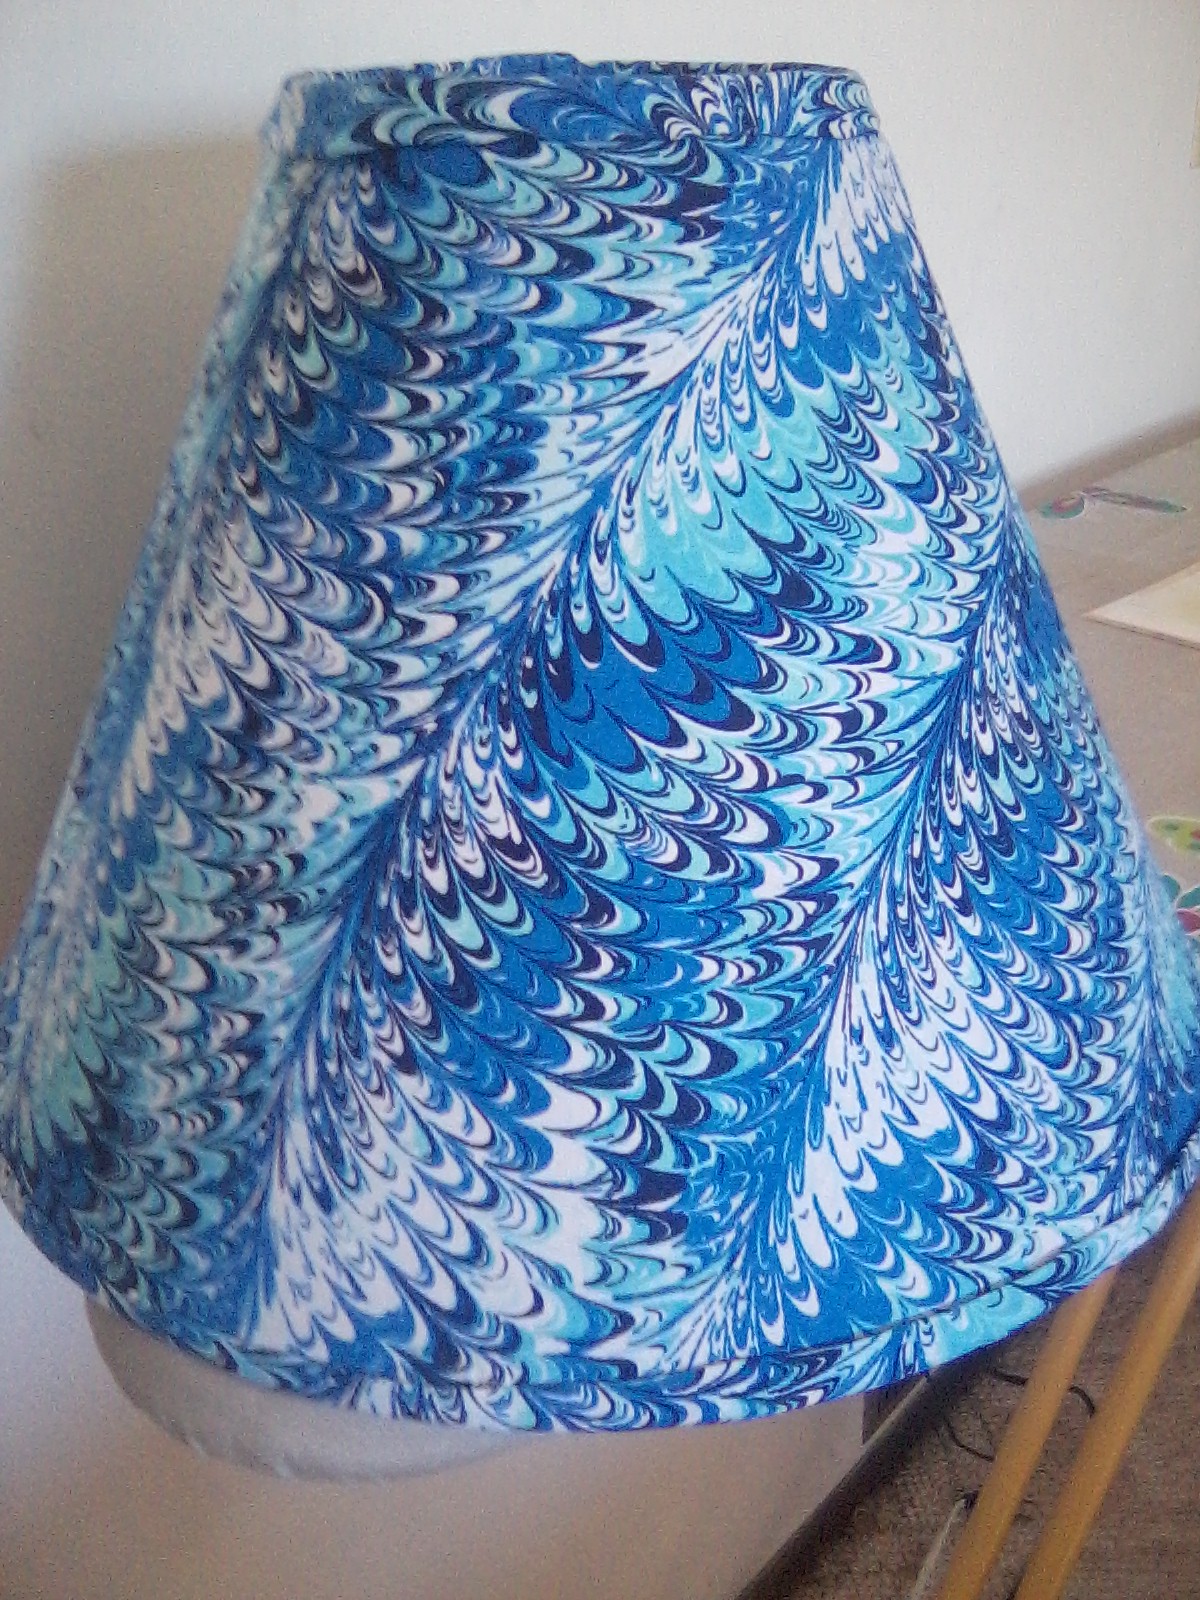
My lamp has a swirl in the globes that I wanted to mirror in the lampshade.  This fabric had the perfect swirl. Even better the fabric was only $6.75.  Perfect for my small budget.


My recovering process-

1. Make and cut the pattern for the new shade.
2. I put the pattern on the bias so the pattern would come out diagonally like the lamp.
3. Spray glued the lampshade and placed the fabric
        pssst... This is sooooo much harder than it sounds.  Just to warn you.
4. We made two more patterns for the trim on the top and bottom.
5. Attach the trim so that 1/2 inch is shown on each side.
        I used a hot glue gun for this part.


Here's the finished shade!  


Come back next week to see the total finished lamp.

Sunday, September 9, 2012

Shell Wind Chime of my Dream

If you don't remember this fun fact about me I absolutely love anything that tinkles or makes noise when it moves.

 Problem one... I don't have anything that tinkles. 
 Problem two... I have a tote full of seashells collecting dust in my closet.

Solution... make a seashell wind chime!

What I needed for this project.
- seashells (I sure didn't need to buy any of these.)
- fishing line ( I used between 5lb and 8lb test.)
- three rings ( large, medium, and small)
- clear round beads
- drill (and plenty of really small drill bits)
- one ring ( I used a large key chain ring.)

Sorry I don't have any pics of the process but here is the finished project.


The largest ring has 3 rows of 16 shells.
The medium ring has 3 rows of 25 shells.
The small ring has 1 row with 10 strings and 5 shells per string.


I was really excited that I got the shells on the largest ring to cascade all the way around in an obvious way.


I LOVE the way this looks from below!

PS. If you were curious about how many shells I used but didn't want to do the math, the grand total of seashells was... 173!

PPS. I still have more shells I have to use!  Any suggestions are welcome!


Tuesday, September 4, 2012

Going Pendant Crazy!


Holy crap, I immediately love this pendant light from Houzz.  They call it the Worlds Away Venus Pendant Capiz Shell Floral done in turquoise.  It also comes in pink, yellow, and white if you are interested... I now I am interested in multiple colors.  Unfortunately for me it's going to set me back $423 dollars I don't have.


This is another pendant light that caught my eye on Houzz.  This light is from Lamps Plus and can be found under the name Vertigo Large Pendant Light.  Personally I would call it an optical illusion light.  It is like one of these optical illusions.
800Px-CafĂ© Wall.Svg             480Px-Zollner Illusion.Svg
Any way getting back to the light before my eyes drive me nuts, this light would be a conversation starter both because of it's shape but also it's 32.75 inch height.  


These cute little, well not really little (20 inch diameter), gems are from Neenas Lighting.  They are designed by Ferruccio Laviani for the brand Kartell.  I'm not sure how well these would work at the size they are but when I first saw them I imagined a tight little grouping of all different colors to create a total statement as one.  The Kartell Pendant fixture is made of methacrylate in a ton of ranging colors.  The company describes them as soap bubbles and personally I think that is a great way to describe them!


Now meet the sleeker version of a pendant light, the Leucos Fairy Cylinder also by Neenas Lighting.  This slim little guy would look great over a bar or maybe even to highlight a modern fireplace.  I know this is much different from the other pendants here but if you are like me, my eyes need to be able to rest for a while in a space and not be constantly overly stimulated at every  light source.

Labor Day Weekend Art


I was in downtown Rock Island this weekend to see the Grand Prix.  I went there looking for the GoKarts but I rediscovered this statue on the way between the truck and the racing action.  I like the idea that the statue looks like both a guitar and a person if you use your imagination.  Man and music are one inside a musician or any creative person.

Tuesday, August 28, 2012

It's time to get crafty!


It's been a while since I've been back to visit the wonderfully scary world of blogging.  Sorry I've been sucked into sewing and crafting around my house all summer.  Now that I'm back in school my crafting time has become some-what limited so I have to live vicariously through other crafters in the world.
As you might remember I also get sidetracked in any lighting section I find myself near so I can easily combine crafting and lamps.  (Plus I have a class project where I get to make one myself... BONUS!)  So here are some of the really cool and interesting craft ideas I found for remaking lampshades.

Below is a lamp shade idea from Jamie that she posted on Ucreate.  She took this plain white lampshade in her daughters room and gave it the fun fresh look below.


To do this she made lots of fabric circles and hot glued them to the lamp overlapping them.  To make sure she didn't have any gaps at the top and bottom of the shade she used inverted half circles along the edge. 
 
This is a really cool idea but personally I don't think I could stand to cut out that many fabric circle.  I would probably go a smidge bit more crazy after the first 10 circles because my circles would turn out to be more oval than circles.
 
 
Here is another one of those lamp transformations that look really expensive but really isn't all that bad to do yourself if you have some patience.  I don't all the time but I might have to stock up on patience for this craft because I really fascinated by the texture it gets in the end.
 
 
The Crafty Texas Girls (I had to bring a little country to this post didn't I?)  wanted to make over the perfectly nice but no longer suitable lamps for a bedroom.  They took this burgundy lamp shade and:


1. took off all the trim and bead work,
2. covered it with muslin
3. made strips of ruffled muslin
4. glued the strips on to the lamp shade


And tada she ended up with a totally ruffled lampshade.  It's hard to see in this picture but they left the edges of the ruffles raw so that it has that slight rustic feel without making it feel inexpensive.


Here is an interesting way to destroy those menacing school globes that gave me nightmares.  Why would a globe give me nightmares... I have terrible directional skill so these silly globes taunted me by going round and round like my brain every time I get lost in my own town.
 
This lamp on Pinterest split the globe in half to create two separate hanging lamps.  These lamps no doubt belong to someone who likes to travel or loves maps.  


It makes me wonder what else I can destroy from my nightmares and make something I truly enjoy?
 
 
Hmmmm... 

Wednesday, May 2, 2012

Shine a Little Light


As always I like to share my little quirks with everyone, and the quirk that took over my brain (it does it a lot actually) was lighting.  I can't go into a home improvement store or furniture store and not go in search for the lighting section.  I am like a kid in a candy store that loves almost everything she sees.  I spend a long time just looking up fascinated by the different shapes and designs within a small area.  So now getting on to some of the newest lights I have stumbled over and fell in love with.
Here is an awesome chandelier that I found from Salgado Saucier.  I can just picture this over a well worn dining table.  The walnut and blackened steel really emphasize the down home feel that I personally love.  I am also intrigued by the seeded glass that distorts the light just a smidge. 


Usually I tend to focus on an amazing shade first but since these green and yellow glazed porcelain lamps didn't have a shade I had to look at the base.  Man I'm glad these weren't shown with a shade because the color is fantastic, the way it seems to seep into the next area is just fascinating to me.  

Unfortunately it wouldn't be very use nice to have a bare bulb in your room I would suggest a simple neutral tan shade that would not detract from the base.
 PS: I just want to say thank you to Remains Lighting for showing me a pair of amazing bases.


Holy crap these sconces are incredible!  I personally love geodes and add that to my addiction to lighting I have found myself a winner.  The stones can come as large as a foot and the light shines differently through all the many colors hidden in the geode.  These bad boys were found at Tuell + Reynolds.  Below is geode table lamp that they had had hidden... but I found it!  


This chandelier from SCDS Ltd. and is made of formed mica.  I don't know about you but I really want to go up and nudge it a little so I can hear the tinkle that it would make for the next few minutes.  All of the pieces are hand done and equally amazing on their own.  This would create a great focal point in a room with a slightly retro feel to it.

Can't you just hear the tinkle in your ears?


Sorry I just had to add on tinkling crystal chandelier from J. Robert Scott.  This has tiny crystals that surround each ring.  It reminds me of the craft project have have been putting off until I had more time.  It's the same basic concept of this light but with tiny seashells instead of crystal. 

Okay back on topic... the only thing that bothers me about this light is that the actual lights are above the crystal so they do not reflect as easily and bounce the light around the room.

I hope this shined a little light...